Linux · high risk
SSH Hardening Without Locking Yourself Out
A practical Debian and Ubuntu SSH hardening guide focused on safe staged changes, rollback planning, key-only access, sudo survival checks, UFW, fail2ban, and verification before closing old access paths.
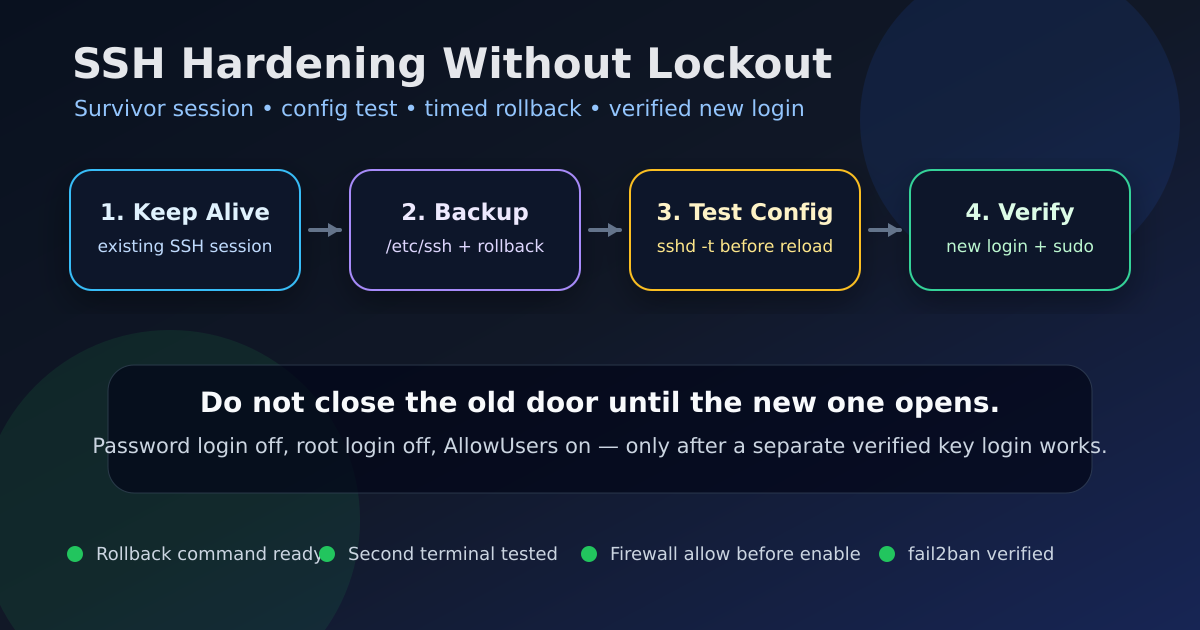
SSH Hardening Without Locking Yourself Out
Estimated reading time: 17 minutes
Overview
SSH hardening is one of the easiest ways to improve a Linux server, and one of the fastest ways to lock yourself out.
This companion guide focuses on the safe operating procedure, not just the final sshd_config lines. The goal is to move a Debian or Ubuntu server toward key-only SSH, disabled root login, limited users, firewall controls, and fail2ban without losing the only working remote session.
The main rule is simple: do not close the old door until the new door has been tested from a separate session.
This guide covers:
- Preflight checks before touching SSH
- Backups and a timed rollback job
- SSH key verification
- A safe OpenSSH drop-in configuration
- Testing with
sshd -tbefore reload - Keeping a survivor session open
- UFW rules that do not cut off SSH
- fail2ban as rate limiting, not magic security
- Emergency rollback through console access
Risk level: high. SSH and firewall changes can break remote access. Keep a Proxmox console, provider console, IPMI, iDRAC, PiKVM, or local keyboard/monitor available before applying this to a remote system.
Official references used while preparing this guide:
- OpenSSH server manual
- Ubuntu OpenSSH server documentation
- Ubuntu firewall documentation
- Debian SSH server package information
- fail2ban project documentation
Why I Built/Tested This
Many SSH hardening guides show the destination but skip the safe path. They tell you to disable passwords, disable root, change firewall rules, restart services, and hope the terminal stays connected.
That is not how I want to operate GNTECH homelab servers.
A better SSH hardening workflow should be:
- Staged, so one change can be tested at a time
- Reversible, so a bad line does not become a console rescue session
- Compatible with Debian and Ubuntu defaults
- Clear about what each command does
- Honest about risk, especially for remote servers
This post does not claim these exact commands were executed against your server. It is a validated operating pattern. Apply it to a test VM first, then adapt usernames, IP ranges, and firewall rules to your environment.
Hardware/Software Used
Reference target:
| Component | Baseline assumption |
|---|---|
| Operating system | Debian 12 or Ubuntu 22.04/24.04 server |
| SSH server | OpenSSH server package, usually openssh-server |
| Firewall | UFW on top of nftables or iptables backend |
| Rate limiting | fail2ban with the sshd jail |
| Admin access | A non-root sudo-capable user |
| Recovery path | Proxmox console, provider console, IPMI, iDRAC, PiKVM, or local console |
| Client | A separate terminal on your workstation for testing new logins |
For a headless server, the recovery path is not optional. If you do not have console access, postpone aggressive SSH changes until you do.
Architecture
The safe workflow has two lanes.
The first lane is the survivor lane: the existing SSH session that remains open until all verification is complete.
The second lane is the test lane: a new connection attempt from your workstation after each change.
Existing SSH session stays open
        |
        v
[backup current config]
        |
        v
[schedule timed rollback]
        |
        v
[write SSH drop-in]
        |
        v
[sshd -t syntax check]
        |
        v
[reload sshd, not reboot]
        |
        v
[new terminal: verify login]
        |
        v
[cancel rollback only after success]
Hardening layers used in this guide:
| Layer | Purpose | Lockout risk |
|---|---|---|
| SSH key login | Makes password removal possible | Medium if key was copied wrong |
PermitRootLogin no | Blocks direct root SSH | Low if sudo user works |
PasswordAuthentication no | Removes password brute force path | High if key login is not tested |
AllowUsers | Limits which accounts may SSH | High if username is wrong |
| UFW allow/limit | Controls network exposure | High if enabled before allowing SSH |
| fail2ban | Bans repeated failed login attempts | Medium if your IP gets banned |
Installation
Install the packages used by this guide:
sudo apt update
sudo apt install -y openssh-server ufw fail2ban
Confirm the SSH daemon unit name. Debian and Ubuntu usually provide the ssh service, and many systems also alias it as sshd.
systemctl status ssh --no-pager
systemctl list-unit-files 'ssh*'
On the client machine, generate an Ed25519 key if you do not already have one:
ssh-keygen -t ed25519 -a 100 -f ~/.ssh/id_ed25519_gntechCopy the public key to the server:
ssh-copy-id -i ~/.ssh/id_ed25519_gntech.pub adminuser@server-ipReplace adminuser and server-ip with your real sudo-capable user and server address.
Before you harden anything, verify key login from a new terminal:
ssh -i ~/.ssh/id_ed25519_gntech adminuser@server-ipInside that new session, verify sudo works:
sudo -v
id
Do not continue until key login and sudo both work.
Full Configuration
This guide uses a drop-in file instead of editing the full /etc/ssh/sshd_config directly. That makes rollback cleaner and keeps distribution defaults easier to review.
First, create a dated backup bundle:
sudo install -d -m 0700 /root/ssh-hardening-backups
sudo tar -C / -czf /root/ssh-hardening-backups/ssh-etc-backup-$(date +%F-%H%M%S).tar.gz etc/ssh
sudo cp -a /etc/ssh/sshd_config /root/ssh-hardening-backups/sshd_config.$(date +%F-%H%M%S).bak
Confirm your main config includes drop-ins. Most current Debian and Ubuntu releases include this line:
sudo grep -n '^Include /etc/ssh/sshd_config.d/\*.conf' /etc/ssh/sshd_configIf the command prints nothing, review your distribution defaults before adding a drop-in. Do not blindly add an include line on a remote server unless you have console access.
Create the hardening drop-in:
sudo install -d -m 0755 /etc/ssh/sshd_config.d
sudo tee /etc/ssh/sshd_config.d/10-gntech-hardening.conf >/dev/null <<'EOF'
# GNTECH SSH hardening baseline
# Keep a survivor SSH session open while applying this file.

PubkeyAuthentication yes
PasswordAuthentication no
KbdInteractiveAuthentication no
PermitRootLogin no
PermitEmptyPasswords no
MaxAuthTries 3
MaxSessions 4
X11Forwarding no
AllowTcpForwarding no
ClientAliveInterval 300
ClientAliveCountMax 2

# Replace adminuser with your real sudo-capable account.
AllowUsers adminuser
EOF
Important: replace adminuser before reloading SSH.
Use this command to patch the placeholder safely:
sudo sed -i 's/^AllowUsers adminuser$/AllowUsers your-real-user/' /etc/ssh/sshd_config.d/10-gntech-hardening.confIf more than one account needs SSH access, list them explicitly:
AllowUsers gerlin ansible-backup monitoringUse a timed rollback before reloading SSH. This gives you a recovery path if the reload succeeds but the new login test fails.
sudo systemd-run \
  --unit ssh-hardening-rollback \
  --on-active=5m \
  /bin/sh -c 'rm -f /etc/ssh/sshd_config.d/10-gntech-hardening.conf && systemctl reload ssh'
Now test the OpenSSH configuration without applying it:
sudo sshd -tIf sshd -t prints anything or exits non-zero, stop and fix the configuration. Do not reload SSH.
Reload SSH, not the entire server:
sudo systemctl reload sshFrom a separate terminal, test a new key-based login:
ssh -i ~/.ssh/id_ed25519_gntech your-real-user@server-ipIn that new login, verify sudo still works:
sudo -vOnly after the new login works should you cancel the timed rollback:
sudo systemctl cancel ssh-hardening-rollback.timer
sudo systemctl reset-failed ssh-hardening-rollback.service ssh-hardening-rollback.timer
Now configure UFW safely. Allow SSH before enabling the firewall.
sudo ufw default deny incoming
sudo ufw default allow outgoing
sudo ufw allow OpenSSH
sudo ufw limit OpenSSH
sudo ufw status verbose
If UFW is not already enabled, enable it only after confirming the SSH allow rule exists:
sudo ufw enable
sudo ufw status numbered
Configure fail2ban for SSH:
sudo tee /etc/fail2ban/jail.d/sshd.local >/dev/null <<'EOF'
[sshd]
enabled = true
port = ssh
filter = sshd
backend = systemd
maxretry = 5
findtime = 10m
bantime = 1h
EOF
Restart fail2ban and check the jail:
sudo systemctl restart fail2ban
sudo fail2ban-client status
sudo fail2ban-client status sshd
If your server does not log SSH auth events to systemd journal, use the appropriate auth log backend for your distribution. On Debian and Ubuntu with rsyslog, /var/log/auth.log is common.
Verification
Run these checks before closing the survivor session.
Check SSH syntax:
sudo sshd -tCheck the effective configuration for your user and source address:
sudo sshd -T -C user=your-real-user,host=server-ip,addr=client-ip | grep -E '^(passwordauthentication|kbdinteractiveauthentication|permitrootlogin|pubkeyauthentication|allowusers|maxauthtries|maxsessions|x11forwarding|allowtcpforwarding)'Expected values should include:
pubkeyauthentication yes
passwordauthentication no
kbdinteractiveauthentication no
permitrootlogin no
maxauthtries 3
maxsessions 4
x11forwarding no
allowtcpforwarding no
From your workstation, verify key login:
ssh -i ~/.ssh/id_ed25519_gntech your-real-user@server-ipTry a password-only login attempt. This should fail:
ssh -o PreferredAuthentications=password -o PubkeyAuthentication=no your-real-user@server-ipVerify root login is blocked:
ssh root@server-ipVerify UFW:
sudo ufw status verboseVerify fail2ban:
sudo fail2ban-client status sshdCheck recent SSH logs:
sudo journalctl -u ssh --since '15 minutes ago' --no-pagerOn some systems, the unit or log source may differ. If journalctl -u ssh is empty, check:
sudo journalctl -u sshd --since '15 minutes ago' --no-pager
sudo tail -n 100 /var/log/auth.log
Troubleshooting
| Symptom | Likely cause | Safe fix |
|---|---|---|
sshd -t fails | Typo or unsupported directive | Fix the reported line before reload |
| New login asks for password | Key not offered or not installed | Use ssh -v and check ~/.ssh/authorized_keys |
| New login says permission denied | Wrong AllowUsers entry | Fix username from survivor session or console |
| Existing session works but new sessions fail | New config is active and restrictive | Do not close survivor session; rollback drop-in |
| UFW blocks SSH | SSH was not allowed before enable | Use console and run sudo ufw allow OpenSSH |
| fail2ban bans your own IP | Too many failed tests | Use console or survivor session to unban your IP |
systemctl reload ssh fails | Service name or config issue | Try sudo systemctl status ssh --no-pager and re-run sshd -t |
Rollback the SSH drop-in from the survivor session:
sudo rm -f /etc/ssh/sshd_config.d/10-gntech-hardening.conf
sudo sshd -t
sudo systemctl reload ssh
Unban a client IP from fail2ban:
sudo fail2ban-client set sshd unbanip client-ipTemporarily disable UFW from console access only:
sudo ufw disableDo not use ufw disable as a normal remote troubleshooting step unless you understand the exposure and have a plan to re-enable it.
Security Notes
Key-only SSH reduces password brute force exposure, but it does not remove the need for patching, least privilege, backups, and monitoring.
AllowUsers is powerful and dangerous. A typo can block new logins. Keep the survivor session open until you have tested a fresh login.
Changing SSH to a non-standard port reduces log noise but is not a security boundary. If you use a custom port, still require keys, block root login, limit users, and monitor failed attempts.
Do not disable PAM blindly. On Debian and Ubuntu, PAM is part of normal account and session handling. This guide disables keyboard-interactive authentication, not PAM itself.
Be careful with AllowTcpForwarding no. It blocks SSH tunnels, which is usually good for a hardened baseline, but it can break workflows that intentionally use SSH forwarding. If you need forwarding for a specific automation account, consider a separate Match User block after testing in a lab.
For internet-facing infrastructure, the better long-term pattern is often to avoid exposing SSH publicly at all. Put SSH behind WireGuard, Tailscale, a bastion, or a private management VLAN.
Performance Notes
Ed25519 keys are fast and small. The overhead is negligible for normal homelab and server administration.
fail2ban is lightweight for a small number of SSH attempts. If a server receives heavy hostile traffic, network-level filtering or moving SSH behind VPN is better than relying only on local log parsing.
ClientAliveInterval and ClientAliveCountMax help clean up dead sessions. They do not replace proper session management or account auditing.
UFW limit is useful for basic rate limiting, but it is not a DDoS protection system.
Lessons Learned
The safest SSH hardening tool is not a config directive. It is a second verified session.
Always test with sshd -t before reload. Syntax validation is faster than console recovery.
Use drop-in files for hardening changes. They are easier to remove than hand-edited blocks inside the main config.
Do not cancel rollback until the new login path is proven. A timed rollback may feel excessive, but it is cheap insurance.
Keep emergency notes somewhere accessible from console access. A simple rollback note in your password manager or internal runbook can save time during an outage.
Future Improvements
Future upgrades for a more mature environment:
- SSH user certificates with an internal certificate authority
- FIDO2-backed SSH keys for admin accounts
- A WireGuard-only management path with no public SSH exposure
- Separate SSH policy for automation accounts using
Match User - Centralized auth logs in Loki, Graylog, or another log platform
- Alerting for repeated SSH failures and unexpected root login attempts
- Periodic review of
authorized_keys, sudo users, and stale accounts